Pages

Sunday, July 31, 2011

Hmmm…what to do with a Kershaw pumpkin? - Part III - Kershaw Pumpkin Pie!!

Okay…back again with the final installment of the Kershaw Pumpkin saga!  If you’re coming in late, you can catch up by reading my previous posts (linked below):


Since last Sunday was “covered dish” Sunday at church, I decided some Pumpkin Pies would be yummy (they’re NOT just for Thanksgiving ya know!), so I set aside some of my pureed pumpkin before freezing the rest of it.

I had a couple of frozen pie shells on hand (from a sale at the grocery store), so I grabbed those and decided to save some time.  HA!  BIG mistake!!  They were not deep dish pie shells, and apparently my recipe made a bit too much filling for my two small 9” pie shells.  Oops!

Since the shells were too full, a good bit of overflow spilled onto the crusts as they were going into the oven (darn that oven shelf for sticking when I tried to push it in!).  This caused the spillover filling on the crusts to cook WAY too quickly, and get far more “browned” than I had planned.  Besides that, with my tiny pie shells, the pies were much too thin, and looked TERRIBLE (which is why there are no pictures with this post!), but I decided to take them anyway.

(I sampled a small piece of one of them and it was DELICIOUS - despite the way it looked, and it was headed for CHURCH after all.  Those folks love me and wouldn’t judge me for a pitiful pie crust would they?)

No worries…despite their imperfections, my pies brought several compliments…they were that good!  (I’m sure those good-hearted church folks wouldn’t lie.)

The recipe really is good folks, just don't overfill your pie shell(s) and avoid spilling it on the way to the oven!  If you don’t have the fresh pumpkin puree, a can of store-bought solid pack pumpkin will work fine.

I got my base recipe from Suzanne McMinn’s blog:  (http://chickensintheroad.com/cooking/spiced-cushaw-squash-pie/), then I adapted it as always to come up with my own version.  (By the way, you should really check out Suzanne’s blog, it’s got some GREAT recipes, and her pie is MUCH better looking than mine was!)

Faithy’s Kershaw Pumpkin Pie

2 cups prepared Kershaw pumpkin puree (or canned pumpkin - if you have to)
2/3 cup brown sugar (firmly packed)
1/4 teaspoon salt
1 teaspoon ground cinnamon
1/4 teaspoon ground ginger
1/4 teaspoon ground nutmeg
1/4 teaspoon ground cloves
3/4 cup HEB Real Eggs (or 3 regular eggs)
1 teaspoon vanilla
1 (12 ounce) can evaporated milk
1 large deep dish pie shell (at least 10” size - 9” is definitely too small, and homemade is best)

Whisk together your pumpkin puree, brown sugar, salt and spices in a medium-size mixing bowl.  Add eggs and vanilla and mix again.  Gently whisk in the evaporated milk, and pour into your pie shell.

 Bake on the lowest oven rack at 375° for 60 to 75 minutes (or until a thin knife blade inserted in the center comes out clean).

(Your whole house will smell fabulous while this is cooking!)


Chill thoroughly before serving with a generous dollop of whipped cream.

~~~~~~~~~~~~~~~~~~~~~~~~~~~~~~~~~~~~~~~~~~~~~~~~~~~~~

See what happens when I get behind in my blogging?  I go nuts catching up!  Hope I haven’t bored you to tears today.

Have a wonderful week folks, and keep your eyes open for God’s blessings.  They’re all around us ALL THE TIME!!
--Faithy

Hmmm…what to do with a Kershaw pumpkin? - Part II - Pumpkin Seeds


HOWDY friends!  Hopefully you’ve already read Part I, so you know what we’re talking about here.  If not, check it out and then come back!


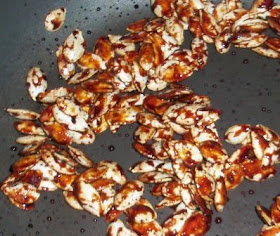
Once I had the pumpkins roasting in the oven, I separated out all the seeds from the stringy pulp I had removed (amazing how many there are in one small pumpkin…and how well they like to hide in all that stuff!), rinsed and dried them.  Then I tossed them with a tiny amount of olive oil and tossed them into a skillet to roast over medium heat.


I cooked them just until they started to brown, then sprinkled them with sugar and seasoned salt.  I can’t really say how much of either one, just until it looks right (as my Mom always says).  Stir them well as the sugar mixture melts and caramelizes.  Once they are really hot and the sugar is well browned, remove them from the heat and let them cool completely.  Then break them apart and enjoy!


I often do this with almonds.  They’re really good to snack on and DELICIOUS tossed into salads.

I took a small bowl of these to my church potluck (mentioned in my Fig Cake blog) last weekend (as a snack), and a sweet, unknowing soul thought they came with a salad that the preacher’s wife made, so she tossed them in there.  When she found out they weren’t intended for the salad, she was so embarrassed.  It was a hit though!  I think the 3 of us were the only ones that knew it had been a mistake.  Everyone else just thought it was yummy!  LOL!

(If you want plain salted pumpkin seeds, they are really easy to do in the oven…just toss them lightly with olive oil, spread them on a jelly-roll pan and sprinkle them lightly with salt.  Then roast them - at 350-375°F - until lightly browned.  Cool and eat!)

If you like to garden, you’ll definitely want to save some of the seeds (resist the temptation to eat them all!) to plant in the fall.  Just air dry them and store them in an envelope in your freezer.

Come back and join me soon for Part III - Kershaw Pumpkin Pie!!

Blessings,
--Faithy

Hmmm…what to do with a Kershaw pumpkin? - Part I - Pumpkin Puree

When I was growing up, both my father and grandfather did a lot of gardening.  One of the things they grew was something my Dad referred to as a pumpkin, and my Mom referred to as a Kershaw.  This is what they look like (although the ones my Dad grew were usually MUCH bigger than this)
 
My brother decided to plant a garden this year, and he thought it would be fun to plant some, for old-times sake.  Once we had them, we had to figure out what to do with them!  LOL!
I remember my Dad making a really delicious soup with them, but of course I don’t have his recipe.  I really don’t remember much else, except that we always grew a lot of them.  Since Dad always called them “pumpkins” (the only kind we ever grew)…I figured any recipe for pumpkins would probably work.
A little internet research informed me that all pumpkins are actually squash in disguise.  There doesn’t really seem to be much rhyme or reason as to why some are referred to as pumpkins and some as winter squash.  (These particular ones are apparently more commonly known as “Cushaws”, but not at our house!)  I’ve always been a squash fan…no wonder I’ve always liked pumpkins too!  Hee, hee…
I used to make a yummy pumpkin soup by taking a mini orange pumpkin, cutting a “lid” out of the top, scooping out the “guts” and seeds, then putting the “lid back on and roasting it.  Later I’d scoop out the cooked pumpkin flesh and put it a blender with heavy cream and spices.  YUM!
I figured something similar would work with these, so…
 
I cut the “pumpkins” in half lengthwise, scooped out the “guts” and seeds (taking care to save the seeds for later…I’ll discuss those in Part. 2), and placed them cut side down on a jelly roll pan.  I baked them in a 350°F oven for about 1-1/2 hours or until soft enough that they could be pierced easily with a fork.  (They kinda collapse a bit as they soften, so don’t worry if that happens…they’re supposed to!)
Once they are fully cooked and soft, scoop all the flesh out of the skins, and puree it in your food processor or blender.  (You can also use a hand masher if you want.)  You’re looking for a finished product about the consistency of mashed potatoes.
 
From this point you can use the puree the exact same way (and in the same amounts) you would use canned solid-pack pumpkin, but it tastes so much better you may never want go back to the can!    I'm told you can refrigerate the puree for up to a week before using or store in the freezer for several months.  (I divided mine up into 1/3 cup portions and froze them in a muffin pan, then once they were frozen transferred them to zipper freezer bags.)
My husband gave me a hard time because I kept “snitching” from the puree before I made the pies!  (This stuff is naturally sweeter than those orange pumpkins, and trust me, it’s REALLY hard to resist!)
Okay…I’ll close out this post, and continue the saga of the Kershaws in another post.  Catch me again for Part II!
Back in a bit… 
--Faithy

UPDATE:  For more good information on these "pumpkins", check out this post by Adam J. Holland over at The Unorthodox Epicure: Confessions of an Aspiring Food Snob, and spend some time looking around while you're there.  Lots of great recipes and fun info.  Be sure to tell him Faithy sent you!

FAIL!!!!!

This morning I tried a recipe for sweet potato pancakes (out of a cookbook I will not name), and I stayed pretty true to the recipe with the exception of my usual substitutions HEB Real Eggs for the eggs, 1/2 the salt, sodium free baking soda instead of regular and 1/3 wheat flour for the flour.  I also substituted canned pumpkin for the mashed sweet potatoes - because that sounded reasonable and I didn't have any sweet potatoes on hand.

The batter was REALLY thick, but I tried it anyway...cooked 4 pancakes for 20 minutes and they were still raw in the middle!  So...I started trying various ways to "help" the recipe....

I started by adding additional milk.  Nope...didn't work.  Same problem.

Then I added some whipping cream.  Nope...didn't work.  Same problem.

Okay...so  I thought maybe a little more canola oil.  Nope...didn't work.  Same problem.

The batter tastes really good (HEB Real Eggs are pasteurized, so I figured they're safe to sample - not so with actual eggs), but the pancakes just NEVER get done in the middle. 

I've NEVER seen anything like it.  (And I've made LOTS of pancakes - even pumpkin pancakes - over the years!)

So...I guess we'll just chalk this one up to a major breakfast FAIL, and move on to dry cereal for breakfast!  LOL!

If you have any recommendations or suggestions on what on earth went wrong, please let me know.

Have a blessed Lord's day...
--Faithy

Saturday, July 30, 2011

Taste and see...

Taste and see that the Lord is good. -- Psalm 34:8

Happy Saturday my friends!  Sorry I’ve been AWOL lately…life has been busy, busy, busy!  Last weekend, I did quite a bit of cooking, but didn’t have time to tell you about it.  I’ll try to catch up a bit this weekend.

A potluck luncheon (or “covered dish” as we like to call it here in South Texas) at church last Sunday prompted me to search out some new recipes to try.  Thankfully, most of them were pretty successful.

First, I did a Fig Cake, which gave me an opportunity to use up some of last year’s fig preserves.  It turned out delicious!!!  If you have any extra fig preserves laying around, you really should try it.

I got the recipe from the “Bountiful Blessings Cookbook” - © 1998 by Barbour Publishing, Inc.  Apparently it was also previously released under the title, “Homegrown Heaven Bound Cookbook.”  This is a fun book of “favorite old-fashioned, down-home, family-tested recipes” submitted by members of a large Christian book club.  The “Fig Cake” recipe was submitted by Virginia Lear, from London, KY, and may be found on p. 247 if you happen to come across this treasure.

As usual, I’ll give you my version of the recipe…

 Don'tcha want to try a piece?

Faithy’s Fig Treasure Cake

1-1/3 cup all-purpose flour
2/3 cup whole wheat flour (or 2 cups all-purpose flour if you don’t have whole wheat)
1 teaspoon baking soda
¼ teaspoon cloves (I NEVER use as much cloves as recipes call for, because they have a tendency to be overpowering - the original recipe called for ½ tsp.)
¾ cup sugar
¾ cup Smart Sugar (the original recipe called for 1-1/2 cups sugar…you can divide it up however suits you!)
¾ cup HEB Real Egg (or 3 eggs, beaten)
1 cup canola oil
1 tablespoon vanilla
1 cup buttermilk
1 cup fig preserves
1 cup chopped pecans (I actually only used about ½ cup because I’m running low)

Preheat oven to 325° F.

In a medium-sized bowl, whisk together the flours, baking soda and cloves.  Set aside.

Cream together sugar and eggs (1 at a time if you’re using regular eggs).  Add oil and vanilla.  Mix thoroughly.

Add dry ingredients to the creamed mixture, alternately with buttermilk.  Stir in preserves and pecans.  Mix well.

Pour into a greased (I sprayed mine with cooking spray) Bundt pan and bake for 1 hour.

Cool (if you can wait that long to try it!), slice and serve with whipped cream or plain.

~~~~~~~~~~~~~~~~~~~~~~~~~~~~~~~~~~~~~~~~~~~~~~~~~~~~~~~~

The original recipe listed the buttermilk in the ingredients list, but then never mentioned it again.  LOL!  Not to worry, I’ve baked before, so it wasn’t too hard to figure out a good place to add it.


It smelled so good while it was baking that I just couldn’t stand it.  My husband and I had to sample a couple of slices - just to make sure they were good enough to serve at church! J  Also needed to show the inside for the blog picture. 


Hee, hee…that’s me, always willing to make a sacrifice for the good of someone else.


I’m thinking this recipe would be good with other types of preserves too…I’m thinking peach preserves off the top of my head.  Mmmm…maybe we’ll try that next time I end up with some fresh peaches to make preserves with!


If you have a chance to experiment with it let me know!!


I'll try to get back online this weekend and post my other potluck experiments.
 Hope your weekend is filled with blessings,
--Faithy

Monday, July 18, 2011

When life gives you lemons...

I’ve always been a fan of fresh homemade lemonade, so I’ve made many versions over the years.  (ANYTHING is better than that powdered stuff!)  I came across this recipe in a magazine a few years ago, and have considered it my favorite ever since!  Sad to say, I can’t remember which magazine, much less which issue, but I do know it was something put out by Reiman Publications (my absolute favorite cooking publisher!).  They publish a variety of cooking magazines and cookbooks.  If you’ve never checked them out you should! (http://www.reimanpub.com/)

 
Faithy’s Favorite Lemonade

5 lemons
5 limes
5 oranges
3 quarts water

Sugar or sugar substitute, to taste (the original recipe called for 1-1/2 to 2 cups, but I generally use much less - I often use amber agave nectar http://www.madhavasweeteners.com/agave/ …delish!)

Squeeze the juice from four of the lemons, limes and oranges, and pour into a gallon container.  (I often use store-bought orange juice if I don’t have any oranges in the house.  Just measure the lemon juice and use an equal amount.)  Thinly slice the remaining fruit and set aside for garnish.  Add water and sugar to juices; mix well.  Store in the refrigerator.  Serve on ice with fruit slices:

Yield:  12-16 servings (about 1 gallon)

If you don’t want to make a whole gallon, just use 1 part each of the fruit juices add water and sweetener to taste!  By the glass or by the gallon, it’s guaranteed to refresh your body & spirit!!


Happy Monday!
--Faithy

Saturday, July 16, 2011

Another Saturday morning, another new recipe to try….


This morning I decided to try another recipe from the same little treasure book I found my apple-pecan muffin recipe in last week.  As I mentioned then, it’s a little 4” x 6” cookbook called Texas Morning Glory:  Memorable Breakfast Recipes from Lone Star Bed and Breakfast Inns - ©The Great Texas Line Press (no year listed).

On pg. 42, I found this recipe listed as “Lemon Raspberry Muffins” from the Mound Street Bed and Breakfast in Nacogdoches, TX.  Since I’ve got family ties and lots of precious memories associated with Nacogdoches, this one interested me.

(I’m posting my version of the recipe, as usual.  If you want the original let me know and I’ll send it to you.)
Lemon Black Raspberry Muffins
1-1/2 cups all purpose flour
1/2 cup whole wheat flour
1 tablespoon sodium free baking powder
1/4 teaspoon salt
3/4 cup Smart Sugar (you can find a link for Smart Sugar at the bottom of my blog page)
1 cup black raspberries (I found these in the freezer section at H.E.B. and thought they’d be worth a try - but you can use any kind of fresh or frozen raspberries or blackberries)
1/2 cup HEB Real Egg (you can use 2 lightly beaten eggs if you prefer)
1/2 cup heavy whipping cream (I know, I know…but I couldn’t resist!)
1/2 cup skim milk (there…does that make up for it? LOL!)
1 teaspoon lemon extract

Preheat your oven to 425°F.
In a medium-sized bowl, whisk together the flours, baking powder, salt and Smart Sugar.  Gently fold in the black raspberries.  Set aside.
In another bowl, combine the eggs, whipping cream, milk and lemon extract.  Add to dry ingredients.  Stir gently until just moistened.  If you stir too hard you’ll end up with a purple batter.  J
Spoon batter into greased muffin tins (I always use a large cookie scoop or ice cream scoop for the perfect amount of batter and MUCH less mess!) and bake for 20 to 22 minutes.  The original recipe said that it would make 18 muffins, but mine only made 13 regular sized ones.
DELICIOUS!!!
NOTES: 
--The original recipe said that it would make 18 muffins, but for me it only made 13 regular sized ones.
--The recipe also said to bake for 20 to 22 minutes, but mine were just a bit more “golden brown” than I would have liked at 20 minutes.  Next time I’m going to try 18!
--Although still very good, I think the lemon extract caused a bit of a medicinal flavor.  I think I’m going to try lemon juice and a little bit of fresh lemon zest next time.
~~~~~~~~~~~~~~~~~~~~~~~~~~~~~~~~~~~~~~~~~~~~
On a side note, if you’ve never been to the “Oldest Town in Texas”, you should go.  It’s a great place for a weekend trip.  They’ve got LOTS of history (which I love!) and some neat bed and breakfast places, etc.  Not to mention that they’re deep in the beautiful Piney Woods.
Another bit of trivia…did you know that Nacogdoches County is the top blueberry producer in Texas?  Hmmm…guess maybe I should have tried using blueberries.  Sounds like an experiment for another day….
Blessings…
--Faithy

Thursday, July 14, 2011

Raisins...a yummy lesson in patience!

My brethren, count it all joy when you fall into various trials, knowing that the testing of your faith produces patience.  But let patience have its perfect work, that you may be perfect and complete, lacking nothing. -- James 1:2-4 --
Do you ever end up with more grapes than you can eat before they start to lose their fresh appeal?  It seems like that happens to me all the time!
I absolutely cannot stand to waste food if I can help it, so years ago I started making raisins out of all my “past prime” grapes rather than throwing them out.  If you’ve never tried homemade raisins, YOU SHOULD!  They are so yummy, and easy to make.
Just pull all the grapes (any kind of seedless grape will do) off the stems and discard any that may be too far gone (with large brown spots, or mold).  Lay them out on a sheet pan, trying to keep them from touching each other if possible.  (This can be tricky if they are still nice and plump because they just love to roll around on the pan!)  J 
 
(going into the oven!)
Set your oven to its lowest temperature (mine is about 150°F), and pop them in.  Then just leave them there.  (That’s the hardest part!)  I usually do this before going to bed, and just leave them overnight, although I’ve done it during the day as well.  It’s just harder then because I tend to need my oven during the day. 
It works best to use grapes of about the same size, that way they cook in about the same time.  If you have small and large ones on the same pan, you may have to remove the smaller ones before the big ones are done.

(almost done!)
Depending on the size of the grapes, they can take quite a while.  (I usually leave my oven light on while they’re in there so I don’t forget about them completely.)  When they start to look like raisins you can taste-test them to see if they’re done.  BE CAREFUL THOUGH…THEY’LL BE VERY HOT!!
It may take you a couple of times to get them the way you like them.  I’ve overcooked a few, and they become char-flavored little rocks.  J  I’ve also learned that they tend to plump back up after a while, which is a sign that they’ve been in too long.
These raisins are larger and have SOOOO much more flavor than the ones you buy at the store!  I sometimes have to chop them up to use them in recipes, but they are absolutely delicious!

(Want some?)
This can be a great “recycling” project for your kids too!  Give it a try and let me know what you think!
Blessings…
--Faithy

Sunday, July 10, 2011

Hey Faithy...what's for breakfast?

I’ve got a terrific new recipe, and I’m so glad you asked!  I tried out another new cookbook yesterday, and the results were so yummy I’m having leftovers for breakfast today!

As my husband can confirm, I have spent many years and countless hours trying a variety of apple muffin recipes to find one I REALLY like.  I’ve made many good ones over the years, but never really found “THE ONE”.  I think I may have actually found it this time.   Mmmmm, these are good!

I found this simple treasure in a little 4” x 6” cookbook called Texas Morning Glory:  Memorable Breakfast Recipes from Lone Star Bed and Breakfast Inns - ©The Great Texas Line Press (no year listed).  It’s on pg. 42, listed as “Apple-Pecan Muffins” from the Wicklow Inn in Corsicana, TX.  Makes me want to go to Corsicana!!

(As usual, I adapted it a bit to make it my own, so I’m posting the adapted version.  If you want the original let me know and I’ll send it to you.)

Faithy’s Favorite Apple-Pecan Muffins

3/4 cup all purpose flour
3/4 cup whole wheat flour
1/2 cup old-fashioned oat meal
2 teaspoons sodium free baking powder
1 teaspoon ground cinnamon
pinch of salt
1 Smart Balance buttery stick (1/2 cup), softened (or 1/2 cup butter)
1 cup brown sugar (I would have used Whey Low Gold, but I am out)
1/2 cup fat free sour cream
1/2 cup HEB Real Egg (you can use "Egg Beaters" or 2 lightly beaten eggs if you prefer)
1 large Granny Smith apple, peeled and chopped
1/3 cup chopped pecans
Preheat your oven to 375°F.
In a medium-sized bowl, whisk together the flour, oatmeal, baking powder, cinnamon and salt.  Set aside.
Cream butter and sugar until fluffy, add sour cream and eggs (1 at a time if you’re using regular eggs), and blend thoroughly.  Add dry ingredients to the creamed mixture, just until blended.  DON’T OVERMIX!
Fold in apple and pecans.  (I’m thinking I might try adding a few dried cranberries next time too!)  Pour batter into greased muffin tins and bake for 20 minutes.
YUM!

The discovery of a new dish does more for the happiness of mankind than the discovery of a star. -- Anthelme Brillat-Savarin --

Thursday, July 7, 2011

Trying new things can pay off...


-- This is the day which the LORD hath made; we will rejoice and be glad in it. -- Psalm 118:24 --

I tried making some Banana Zucchini Bread last week.  Got the recipe from The Christian Bed & Breakfast Cookbook - published by Barbour & Company, Inc. - © 1997 - p. 260 (Not By Bread Alone chapter) - submitted by Emil & Barbars Schoch - Sanctuary Ministries in Defiance, OH. 

Won't share the recipe today, 'cause I don't have time.  (Message me if you want me to send it to you!) 

It was pretty good, but I think I liked the Pumpkin Zucchini Bread better.  However, I did learn something new.  It called for raisins (which I thought sounded icky with banana bread), so I made 1/2 the batter plain and 1/2 the batter with raisins.  The raisin batch was yummy.  WHO KNEW?  J

A good reminder that it's always good to try new things, even if they sound a bit odd.  You never know what you might like if you don't try it!! 

If you have a second, please leave a comment and let me know some of the odd things you have tried that turned out better than you thought they would.

Have a GREAT day!!!
--Faithy 


Monday, July 4, 2011

Happy 4th of July!!! (Pumpkin Zucchini Bread)


Pumpkin Zucchini Bread
--taken from Bountiful Harvest - published by Taste of Home Books - ©1994, Reiman Publications, L.P. - p. 25 (Squash Chapter)... submitted by Pat Thompson, Spokane, Washington

3 eggs, lightly beaten (I always use HEB’s “Real Egg” egg substitute- similar to Egg Beaters, but nutritionally healthier - AND cheaper - in my opinion - it helps keep my cholesterol down, and I really can’t tell any difference)
2 cups sugar (I used “Smart Sugar” - see www.trysmartsugar.com)
1 cup canned pumpkin
1 cup butter or margarine, melted (I always use “Smart Balance” buttery sticks)
1 tablespoon vanilla extract
3 cups all-purpose flour (I almost always use ½ all purpose flour and ½ whole wheat flour when I bake)
1 teaspoon baking soda
1/2 teaspoon baking powder (I only use sodium free now - you can find it at Whole Foods Market or online)
1/2 teaspoon salt (I always use 1/4 to 1/2 the amount of salt in my baking - with no noticeable difference)
1/2 teaspoon ground cinnamon
1/2 teaspoon ground nutmeg (I only used ¼ tsp. - because I don’t like a strong nutmeg flavor)
1/2 teaspoon ground cloves (I also only used ¼ tsp of cloves - they can easily be overpowering)
1 cup shredded zucchini
1 cup chopped walnuts (I always use pecans - I am a Texan after all!)

In a mixing bowl, combine eggs and sugar.  Add pumpkin, butter and vanilla.  Combine dry ingredients; gradually add to pumpkin mixture and mix well.  Stir in zucchini and nuts.  Pour into two greased and floured 9-in. x 5-in. x 3-in. loaf pans.  Bake at 350ยบ for 45-50 minutes or until breads test done.  Cool in pans 10 minutes.  Remove to a wire rack.  Yield:  2 loaves.

While enjoying the extra time at home this holiday morning, I decided to do some baking.  I made mine into muffins and baked them about 25 to 30 minutes.  They were DELICIOUS!!  This recipe is definitely a keeper!

But first and above all, our thanks are due to the Almighty God for the numerous benefits which He has bestowed upon this people and our united prayers ought to ascend to Him.
-- President James Buchanan --

Happy 4th of July my friends...
Today I am especially grateful to live in a country where I have the freedom to worship my Lord & Savior Jesus Christ!  May we never forget the values our country was founded upon...and may we always remember the sacrifices of those many men & women who have given so much to allow us to maintain the freedoms we so often take for granted.
God Bless America!!!
Blessings,
--Faithy